Inspiration for Education


Leave a comment

Telling Time Go Fish

photo 1

I love to teach MATH!  I think the best part of math is watching when the little light bulb goes on above the kids heads.  Those “Ah Ha!” moments are the ones that I live for.  I also love it when my kids are having so much fun in math class that they don’t even realize that they learned something that day.  One way I try to make that happen is to play math games. One of my favorites is Telling Time Go Fish. Go Fish may be an oldie but I have to say that it’s one that a lot of kids don’t know about these days which makes it feel fresh to them.  What I like about the rules of Go Fish is that it makes the kids use math reasoning and math vocabulary in order to get what they are looking for.   In Telling Time Go Fish the kids need to find a time shown in three different ways – analog, digital and words.

I created these cards for my kids to use and photocopied them onto different colors of card stock. That way I can easily keep track of which cards go with which deck.

photo

We used these after we had spent a lot of time working on the quarter hour.  I found that using all three cards was a nice challenge for my mid to higher level kids.  For my approaching kiddos I took out one type of card, like all of the word cards or all of the digital time cards and had them make matches with only two cards.  There were plenty of cards in the deck to play both ways and it was a quick and easy way to differentiate the lesson.

I also created the same style of cards using time to the minute instead of the quarter hour.  We played Go Fish with those cards later in the unit.  I don’t have a picture of those, but here is a screen shot of one of the pages I created.

Screen Shot 2014-07-19 at 1.13.48 PM

The kids loved this game and kept begging to play it throughout the unit.  After we were done with them, I fixed both sets up for you and posted them on my Teachers Pay Teachers store.  You can click on the links below to check them out.

Screen Shot 2014-07-27 at 9.20.35 PM

Telling Time to the Minute

Screen Shot 2014-06-07 at 9.07.55 AM

Telling Time to the Quarter Hour


Leave a comment

Build a Rainforest in your Classroom – Plants

In a previous post I talked about how I set up the beginnings of the rainforest in my classroom.  Once that was done we used our class rainforest as the jumping off point for multiple learning activities.  We used our rainforest unit to focus on studying plants and animals.  In today’s post I’m going to focus on how we incorporated plants into our classroom rainforest.  We had the kids add 3 types of plants to our rainforest, strangler figs, vines and bromeliads.

Strangler Figs – Strangler figs are one of the more interesting species of the Amazon Rainforest.  It starts out as an epiphyte (or plant whose roots wrap around a tree branch) and extends its roots down around the tree until it eventually completely surrounds the tree, establishes its own roots and kills the host tree.  Click the picture below to be taken to a great site for more information on strangler figs. 210px-Ficus_watkinsiana_on_Syzygium_hemilampra-Iluka   In our rainforest we learned about this interesting plant and then took the same type of paper twists that I had used for wrapping vines around the tree trunks. Only this time I used 4 or 5 white strands.  I  tied the paper twists to the top of the tree and let them hang down.  Then I chose one student per strand and we wrapped them around the tree, kind of like wrapping a May Pole.  I had the kids move over and under and backwards around the tree until we ran out of paper and I tied them off at the bottom.  I’m sorry to say I don’t have a picture of our classroom strangler fig.

Vines – To make vines I collected multiple shades of green and brown yarn.  Then I taught the kids how to braid.  (A useful skill that most did not know.)  We tied our braids to the legs of our desks and then the kids set about braiding a vine.  Each vine was made of two or three colors of yarn.  Kids that got really good at braiding might make a second one with more strands, to make the vine thicker.  When they were done, we draped the vines around the room.

photo 3 (1)

Bromeliads – We always learned a lot about air plants (epiphytes) in our rainforest unit.  I always liked learning about the ecosystems that can exist inside some of the larger bromeliads.  As part of our study we made our own bromeliads out of toilet paper tubes and construction paper. Here are the steps we took to make them.

Materials – Scissors, tape, toilet paper tube, 3 pieces of colorful paper and 2 pieces of green paper each measuring 6″ x 6″ , one tracer – see shapes below

photo

Step One – Trace and cut out the 5 pieces of paper so they look like the papers below.  I created tracers out of card stock for the kids that they would use to get this shape.

photo 5

Step Two – Tape the first yellow page toward the top of the toilet paper roll. Make sure to pull it taught when you put the second piece of tape down.

photo 4         photo 2

Step Three – Tape the next yellow paper on a smidge lower.  I like to line it up so that the points are off set.

photo 1         photo 3

Step Four – Continue taping each layer on making sure to pull the paper taught and making each layer a bit lower and off set from the layer above.

photo 2 photo 1 photo 4

Step Five – I found that a few kids would have trouble getting the papers taped on tight enough and the papers would feel loose and like they were going to fall off.  To help with this I often place a couple of  pieces of tape along the bottom to secure the papers.

photo 3 (1)

Step Six – The final step is to shape the leaves and petals.  I had the kids gently pull each petal down so that they stuck out instead of straight up and down.

photo 1 (1)

And there you have your bromeliad.  We would then hang these from the paper towel tube vines around the classroom, since we didn’t have any branches to hang them from.  They made a great addition to our classroom rainforest.

Check out my next rainforest blog post to find out about the animals we added to our rainforest.


Leave a comment

Make and Take Monday – Place Value Manipulatives


Place value is one of those subjects that I always think will be easy, but turns out to be really hard for some kids to master.  Using hands-on manipulatives is definitely the way to go, but the problem is I never have enough.  Actually … I take that back, I always have plenty of tens and ones, but only a few hundreds and if I’m lucky I might have 1 of those big plastic thousands blocks.

A few years ago  I found a great, and cheap, solution.  I made my own durable manipulatives.  I took plastic canvas, the kind used for needlepoint as seen here at Joann’s, and cut it into ones, tens and hundreds pieces. You want to get the canvas that has the biggest holes you can find, to make the manipulatives easier to manage.

photo 2

If you count the holes in each piece it matches the number it represents, the ones have one hole, the tens have 10 holes and so on.  What I love about these pieces is that  not only do I have enough for every kid in the class to make the number 999, they are small enough to fit on my place value boards and they don’t take a lot of storage space. I keep my tens and hundreds in ziploc storage tubs and the ones I keep in ketchup cups.

photo 1

When teaching thousands I take 10 of the hundreds pieces and tie them together with string.  Though now that I teach Expressions Math and they talk about a thousand looking like a long rectangle, I might go back and make some long thousands rectangles out of plastic canvas. Another project to add to my summer to do list!  😉


Leave a comment

Building a Rainforest in your Classroom – Teacher Prep

Every year for 12 years my second graders built a rainforest in our classroom when we studied our rainforest unit.  It was the biggest project we undertook and to this day it is the one that they talk about when they come back to visit me.  “Remember when we built a rainforest in our classroom?” they ask. As if I could forget.  It is one of their biggest elementary memories, and one of my favorite ways to teach.

So I thought I’d take a moment to share how we built our rainforest.  I’m sorry to say that it never turned out really photogenic.  It was one of those creations that was amazing to stand in the middle of, but never looked that great when I tried to photograph it.  I’ve added a few photos here, but please bear with me on the quality.

To build a rainforest I always put up just the bare bones myself and then had the kids do the rest.  To start, I talked a local carpet store into donating the cardboard tubes that carpets get rolled on.  They turned out to be taller than my ceiling, so I sawed off the ends, and there I had my tree trunks, wedged between the floor and the ceiling.   photo 5

Over the years my rainforest improved, and I’m sorry to say the picture above is from the early years.  You can see in this picture that the tree is just plain cardboard color and the tree tops are a little skimpy.  However in the picture below you can see that one year I painted the tubes to look more wood colored and I changed the tree tops.

photo 1I used butcher paper to trace 5 palm leaves per tree.  Then I taped a long line of florist wire to the underside, to help them poof out a bit.  I taped all 5 leaves to a square of paper and when I put the trees up I wedged the leaves on top.  For the green vine, I bought paper twists at Joann Fabrics.  You pull them mostly, but not completely, open and they give you a crinkly viney look.    I always had 5 trees set up in my room.  Four of the five trees were set up just like the one above, but the middle one did not have a vine on it.  Check out my next rainforest post to find out why.

Another part of the forest that I set up was vines hanging from tree to tree.  I used to hang paper towel tubes on a string for my vines, you can see them in the first picture, but some later team mates started taking long swaths of brown butcher paper and crinkling it into ropes and they looked much more like real vines.

The last step of set up was the waterfall.  To make this I took a long piece of blue butcher paper and stapled it to the wall.  I had it come out into a little pond at the bottom.  Then I took blue saran wrap and covered the whole surface to give it a shiny watery look.

photo 3


I think the best part of about setting up the rainforest is that I used to do it in secret over winter break.  The kids would walk back into the room in the first week of January and be totally enthralled. They just couldn’t get over how much the room had changed.  I love to surprise the kids and watch their faces as they see the first steps of the new learning adventure they are about to embark on.

Check out my next post to see how the kids added to these basics to create their own rainforest details.


Leave a comment

Getting Organized with a Teacher Binder

photo
Keeping data organized is my constant battle.  It seems the longer I teach the more quantities of data I have to keep track of.  I’m super excited about the new teacher binder that I just finished developing.  First, It has really cute cover options which are definitely a must!  😉

Screen Shot 2014-07-19 at 2.59.13 AM         Slide1Screen Shot 2014-07-21 at 11.35.58 PM

Screen Shot 2014-07-27 at 1.35.57 PM

Then, inside one or more binders, I can organize EVERYTHING!  What I’m most excited about is that I’ll have all the lists pre-ready and I just need to fill in the data when I get it.   I have a cute cute sheet for a class list plus a bunch of other student data forms like one for ID numbers, another for usernames and passwords, transportation lists and so much more.

Screen Shot 2014-07-18 at 10.03.43 PM         Screen Shot 2014-07-20 at 10.16.33 PM       

Screen Shot 2014-07-21 at 11.20.31 PM     Screen Shot 2014-07-18 at 10.03.50 PM

I’ve also got forms ready to go for my own professional development.  I have a variety of options for meeting notes, a form for keeping track of professional development credits, and a team meeting form.

Screen Shot 2014-07-18 at 10.34.18 PMScreen Shot 2014-07-18 at 10.06.39 PMScreen Shot 2014-07-18 at 10.06.50 PM

Then there are a whole other set of forms all ready to create a separate substitute folder   .  My sub folder will be rockin’ with emergency procedures,  sub notes, classroom procedures, daily schedule and more.

Screen Shot 2014-07-18 at 10.05.35 PM         Screen Shot 2014-07-18 at 10.05.19 PM        Screen Shot 2014-07-21 at 11.20.48 PM

I don’t know about you, but I feel like I’m always scrambling to find the standards when I need them.  Plus, I needed a way to keep track of which standards I’ve covered during the course of the year.  So I copied them off of the CCSS website and reformatted them into a checklist.  I’m planning on keeping them in my main binder with all of my lesson plans so they are always right there when I need them.

Screen Shot 2014-07-18 at 11.56.58 PM

I’m also one who is constantly rearranging my desks in my classroom.  Sometimes we’re in pairs, sometimes in groups and sometimes in rows.  So I created 10 different blank seating charts to help.

Screen Shot 2014-07-18 at 10.31.50 PM Screen Shot 2014-07-18 at 10.31.26 PM Screen Shot 2014-07-18 at 10.30.57 PM

Last but not least I made this CUTE CUTE CUTE calendar to keep in my binder.

Screen Shot 2014-07-18 at 10.01.02 PM Screen Shot 2014-07-18 at 10.00.38 PM Screen Shot 2014-07-18 at 10.00.25 PM

If you’re interested in using my pages to get your own binder organized click on one of the pictures below.

Screen Shot 2014-07-19 at 2.59.13 AM     Screen Shot 2014-07-21 at 11.35.58 PM    Slide1


Leave a comment

Make and Take Monday – Reading Trackers

So I decided to dedicate Mondays to things you can make yourself to help in your classroom.  We’re all on tight budgets right?  And we all work to find ways to make the most of the resources we have.  And I ALWAYS love when I find good ideas on line that I can easily make for my own classroom.  So my first make and take project is a reading tracker.  I’ve seen lots of things used over the years for kids who need a little extra help tracking the words as they are reading.  The easiest is of course a piece of paper that they hold along each row of words like the picture below.

photo 2


But a few years ago I ran across this great idea and I’ve never looked back.  I don’t know about you, but our school has boxes of old transparency plastic that no one has any use for anymore.  (Let’s all take a moment and bow our heads in respect to the overhead projector.) So what I did was took some of that transparency plastic (laminating plastic would work for this too) and cut it into strips about the width of the pages in our reader.  I made them about 3 inches long.  Then I took a sharpie and drew a line along the top edge of the plastic. And that’s it!

photo 1

What I love about these trackers is that they don’t cover up the words that are coming below.  They help the students develop more natural eye movements as they move from one line to the next, while still helping them to keep track of where they are.  My kids love to use them and always remind me when I forget to pull them out.


Leave a comment

Place Value Cards

This has been a really big summer for me.  I decided to open a store on Teachers Pay Teachers. I never had a clue how many HOURS and HOURS it takes to create a single product for something like this.  When I originally signed up to sell I thought, “Oh, I’ll just tweak the stuff I already use and be on my way.”  Boy was I wrong.  First of all, I don’t want to rip anybody off and to be honest, a lot of the ideas for what I use in my classroom came from other people or websites. I don’t want to take credit for someone else’s work, so right away I realized that almost none of my existing files would be appropriate for TpT.  Plus, most of the clip art I used is copyrighted for single user only, not commercial. So I started creating from scratch and now I am HOOKED!  As of today I am up to 16 products in my store.  I have sold an entire TWO items.  I’m gonna take my $3.00 in earnings and go on a shopping spree baby!  I’m really hoping that my store will start to see some sales in August.  To celebrate my 16th and largest item being posted today, I thought I’d share this little freebie.

photo (1)


This is a set of place value cards that you can put on your chalk/white board to help with teaching place value.  I use them every year with my students, it is such a great way to work on how to say large numbers as well as working on the order of place value terms.  When I use these cards I ask kids questions like….

What is the place value of 2? (ten millions)

What is the value of the 2?  (20,000,000)

What digit is in the ten millions place? (2)

How do you say this number?  (sorry I’m not writing that one out!  🙂 )

Where do you put the commas?  (assuming you hadn’t already put the commas up)

Of course I don’t start the year in 3rd grade with all 9 digits.  We start with numbers in the thousands and then build as we go.  Each time the number gets a little bigger I get gasps and cheers from the peanut gallery.  I love how excited they get when I put a REALLY BIG number on the board.  They think they are so grown up and smart when they can read those big numbers.

You can download this freebie by heading over to my TpT store with the link below.  While you’re there, please check out my other products.  Click the green star under my name to follow me and find out when I post new products, host sales or have new freebies.


http://www.teacherspayteachers.com/Product/Free-Place-Value-Cards-1317862


Leave a comment

My First Mammogram

photo 1

I’ve been putting it off for ages, but today I finally went in for my first mammogram.  It wasn’t as bad as I thought it would be.  It really is amazing how advanced they have become.  My favorite part was that the machine automatically released the moment each x-ray was done.  (No waiting for the tech to walk over and release the pressure.)

 photo 2

The other nice thing was how efficient Kaiser Permanente was.  I was done and out of there 6 minutes after my appointment was scheduled to begin.  (They actually called me in a bit early.)  The tech was so friendly and really explained things to me, like the fact that I have a 2/3 chance of being called back for more tests, just because this is my first mammogram.  In other words

DON’T FREAK OUT 

if I get a call.  It’s probably just routine.  Let’s keep our fingers crossed that I’m one of the 1/3 that don’t need retesting.  😉


Leave a comment

Back to School Bulletin Boards

I love coming up with fresh bulletin boards each year.  I like to scour the internet for fresh ideas.  So I thought I’d post some of my favorites that I’ve done over the last few years.  My absolute favorite is this iPad bulletin board.  We got a grant for 1:1 iPads two years ago and I created this bulletin board to showcase all of the topics that we learn in 3rd grade.

photo 1

Each “app” on the iPad shows one of the topics that we study during the year.

photo 3

Another beginning of the year bulletin board that I love is this sunflower one.

DSC02789

This one is a great kick off to our plant unit which is our first science unit. The kids make the sunflowers the first week of school. (I originally got the idea from the Family Corner  website, but tweaked it to add some extra depth.) The yellow petals are actually coffee filters.  Each kid gets 3 or 4 filters and scallop cuts the edges.  Then they stack all of their filters together and fold them into fourths (so it looks like a piece of pizza.)  Then we mix yellow food color and water together and they let their filters soak up the yellow color for a few hours.  They LOVE watching this process.  After they are dry, they glue them together in the center.  Then we spread glue around the center of the top one and sprinkle black sand in the middle.  Shake it off, let it dry and you have these cute flowers.  I also like to use different sized coffee filters so that we have different sized flowers in the end.


DSC02789

Here’s a close up of one of the flowers.


Another one of my favorite beginning of the year  bulletin boards is this watermelon one, which I’m sorry to say that I forgot to take a picture of until it was halfway pulled down last year.  The title says “A Little Slice of Summer”

IMG_1735

I have the kids write a story about their summer vacation on a piece of paper shaped like of of the watermelon seeds you see in the picture.  Only their paper is slightly smaller than the ones that you see, so the black paper acts as a border around their writing.  I use this writing piece as a pre-assessment in writing and it makes a cute bulletin board!

Another one of my favorites is this hot air balloon bulletin board.  Our town has a hot air balloon festival in the summer so it’s a perfect starting board for our school year.  You can’t see it very well, in the picture, but the trees have little bits of pink tissue paper stuck to them to look like blossoms.  (Which must mean that the year I took this picture I actually did this bulletin board in the spring.  🙂 )  Either way, it’s one of my favorites.  The balloons are made of little pieces of tissue paper glued down to a balloon shaped piece of paper. We used string and a square of construction paper for the baskets.

DSC_1727_2

Finally, I have my Math Words bulletin board that gets put up at the beginning of every year.  As the year goes on we add more and more words to the board.  This picture is from about half way through last year.  The kids refer to it constantly as a reference for key math terms.

photo 4


Leave a comment

Seat Cover Pockets


photo 4

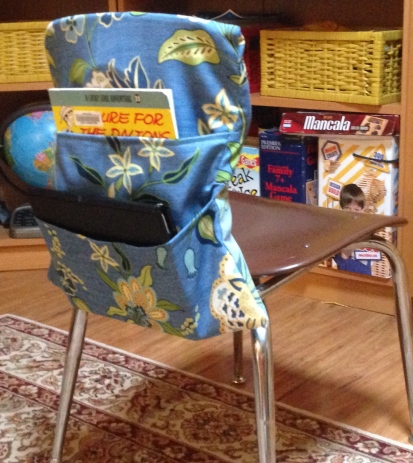
So here I am starting a teacher blog in the middle of summer.  Not a lot of teaching going on, but I have been working so hard this summer to get ready for next year.  I’m really excited about my new seat cover pockets.  One of my co-teachers converted from desks to tables last year and had some seat cover pockets made so the kids could store their gear.  I’m keeping my desks, but I have tiny ones that don’t hold much.  I never let the kids put their iPads or classroom books inside their desks for fear of them getting wrecked. Because of this rule I’ve always had issues with kids not having enough desk space to do their work. Plus, all those iPads and books on their desks just make the room look cluttered. It wasn’t until this June as I was packing up my classroom that I was hit with inspiration.  I could have seat cover pockets too, and I bet I could make my own!  So that has been my big project this summer.  So far I’ve made 10, only 20 more to go.  It took me a while to figure out the design I wanted, but now I’m really happy with what I created.  They each have 2 large pockets in them, one for books and one for iPads.  I also LOVE the fabric I found for them.  I’m going to redo my whole room to color coordinate.


I thought I’d give a little demo here on how to make your own seat cover pockets.  I’ll give the measurements I used for my chairs, but you’ll want to adjust your size to fit your own classroom chairs.  I have to say that I am not a very experienced seamstress.  I could probably count on my fingers the number of sewing machine projects I have done in my life.  I have just enough experience to think I can do anything and just enough ignorance to have to do every project 3 or 4 times before I get it right.  Keeping that in mind, I made my first chair cover with scrap fabric so that I wouldn’t waist my good fabric with my first mess up.   (Turned out to be a good idea. ;-))


I used outdoor fabric for this project because it seemed heavy and stain resistant.  However, were I to do it again I would use a different fabric because this kind frays so easily I worry that the seams won’t hold up under pressure.  Also, it would have been better to use a fabric with no obvious backside to it, because you can see the backside of the fabric when the chair is empty. When buying your fabric I found that I could get 3 covers out of 1.5 yards of fabric (assuming your fabric is 52″ wide.  Narrower fabric will only get 2 covers out a 1.5 yards of fabric.

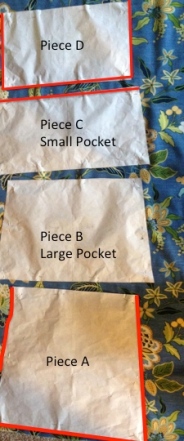
To make these pockets I used 4 pieces of fabric. When making your own make sure the top of pieces A and D measure at least 3/4″ larger than the top of your chair.

Slide1

My next step was to start overcasting the edges.  With this fabric in particular I felt like I needed to overcast everything.
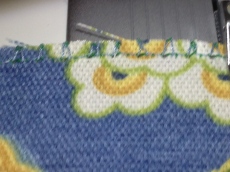
photo 1

Overcasting stitch.

I started by overcasting just the edges outlined in red below.  The rest of the edges get overcast too, but I was able to overcast and sew pieces together at the same time with those edges.

Slide2 Next, take piece C and fold over the overcast edge twice to make a seam.  Sew the seam into place.

photo 2

Next, I put together Piece B and Piece C.  The big trick here is to put them together so both wrong sides are facing up.  (DONT put right sides facing together!!!)  Then overcast all the way around even on the edges of Piece B that don’t touch piece C.

photo 5

Pieces B and C, both with back sides facing up. Overcast ALL THE WAY around piece B, so that the two piece are now sewn together AND piece B has overcasting on all of its edges.

Next, create a seam at the top of piece B by folding over twice and then sewing the seam into place. Then, flip the pocket right side out so that both fronts are facing forward. This finishes the pocket portion of the chair cover.photo 4

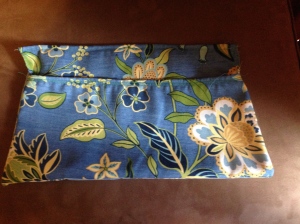
To create the part that slips over the chair, take pieces A and D.  Pin them so that the tops are together, overcast stitch along the TOP edge so that the two pieces are now both sewn together and completely overcast.  Create a finished seam along the opposite edge of piece D by folding the edge over twice and sewing with a straight stitch.  Lay the entire piece open flat and pin the pocket you just completed onto the bottom of piece A.  Pin it so that all pieces are back side facing up.  Line up the widest part of the pocket (the bottom) with the widest part of piece A (also the bottom.)  Pin the three closed sides of the pocket to piece A and sew with straight stitches,  allowing for a 1/4 inch seam.   (I then re-sewed the entire seam to give it extra strength.)

photo 3

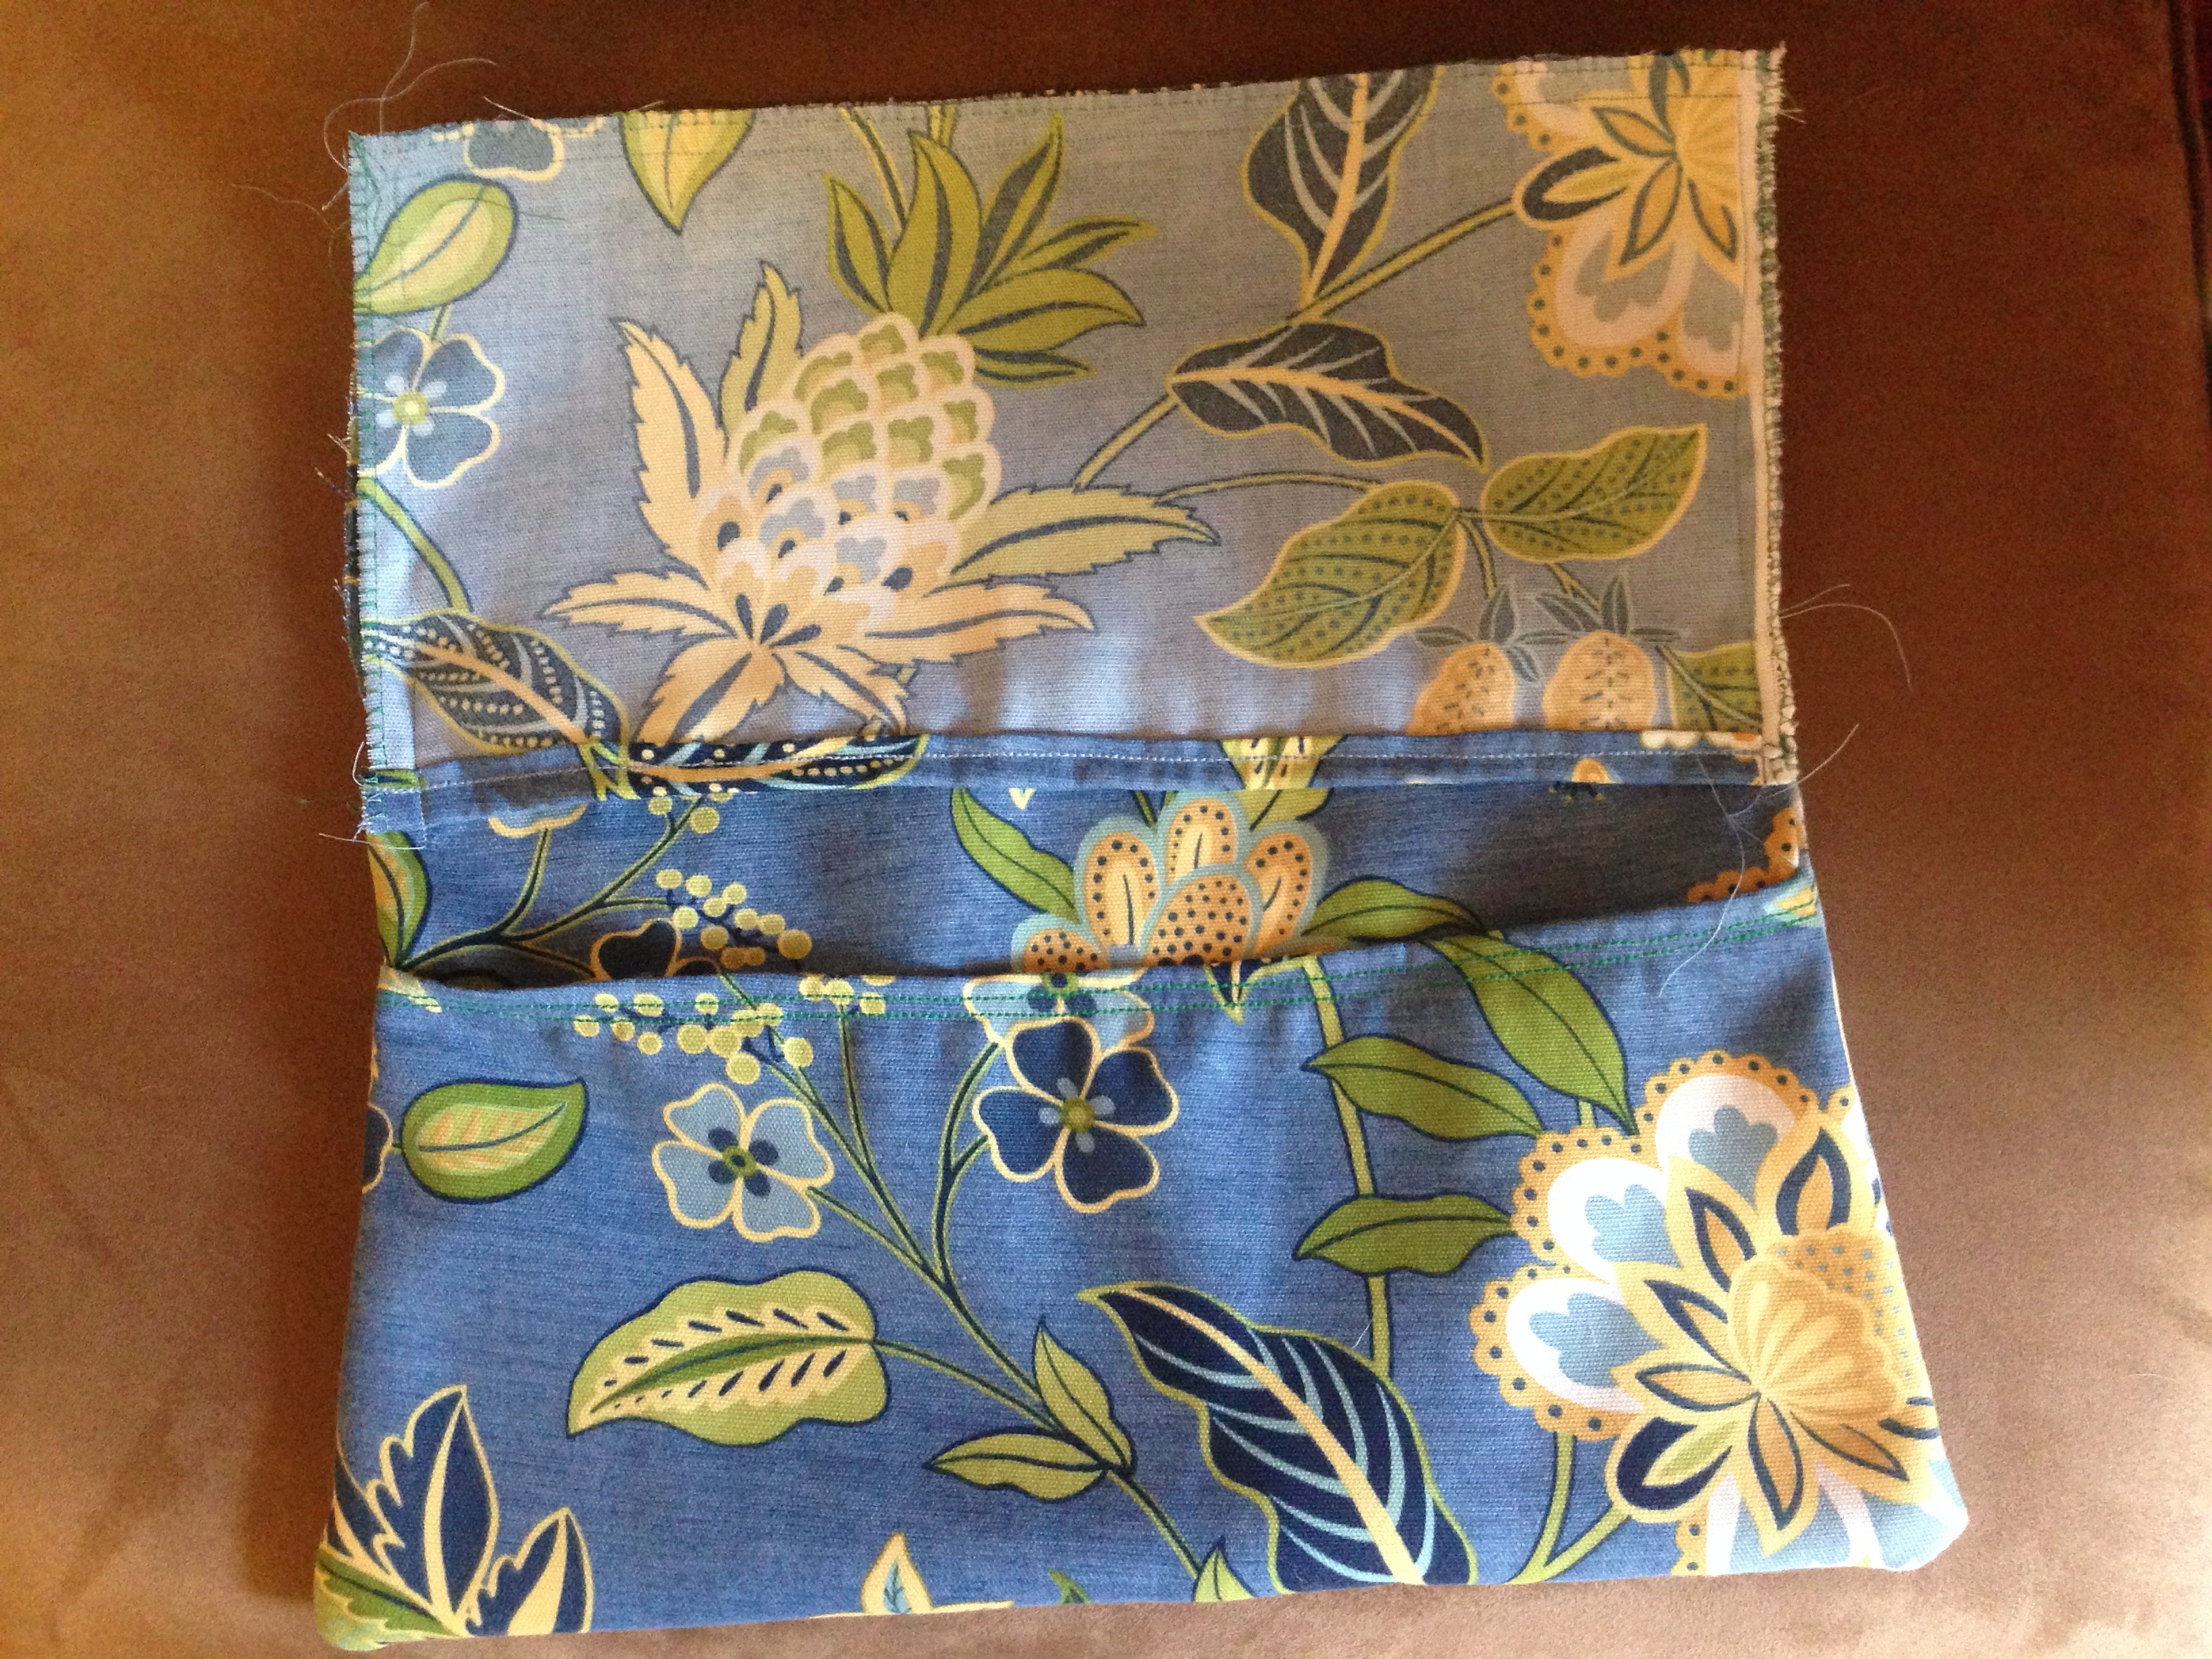
Almost done!  Flip the pocket right side out and fold down the final flap, piece D.  Pin piece D in place along the sides.  I found that it worked best to sew a straight stitch across the top first and then go down the sides.  (I had much less issues with fabric bunching up this way.)  Again, re-sew the entire seam for extra strength.photo 2

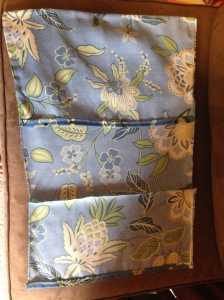
 Finally, flip the last section right-side-out and trim the extra threads.  And there is your two pocket seat cover!

photo 1

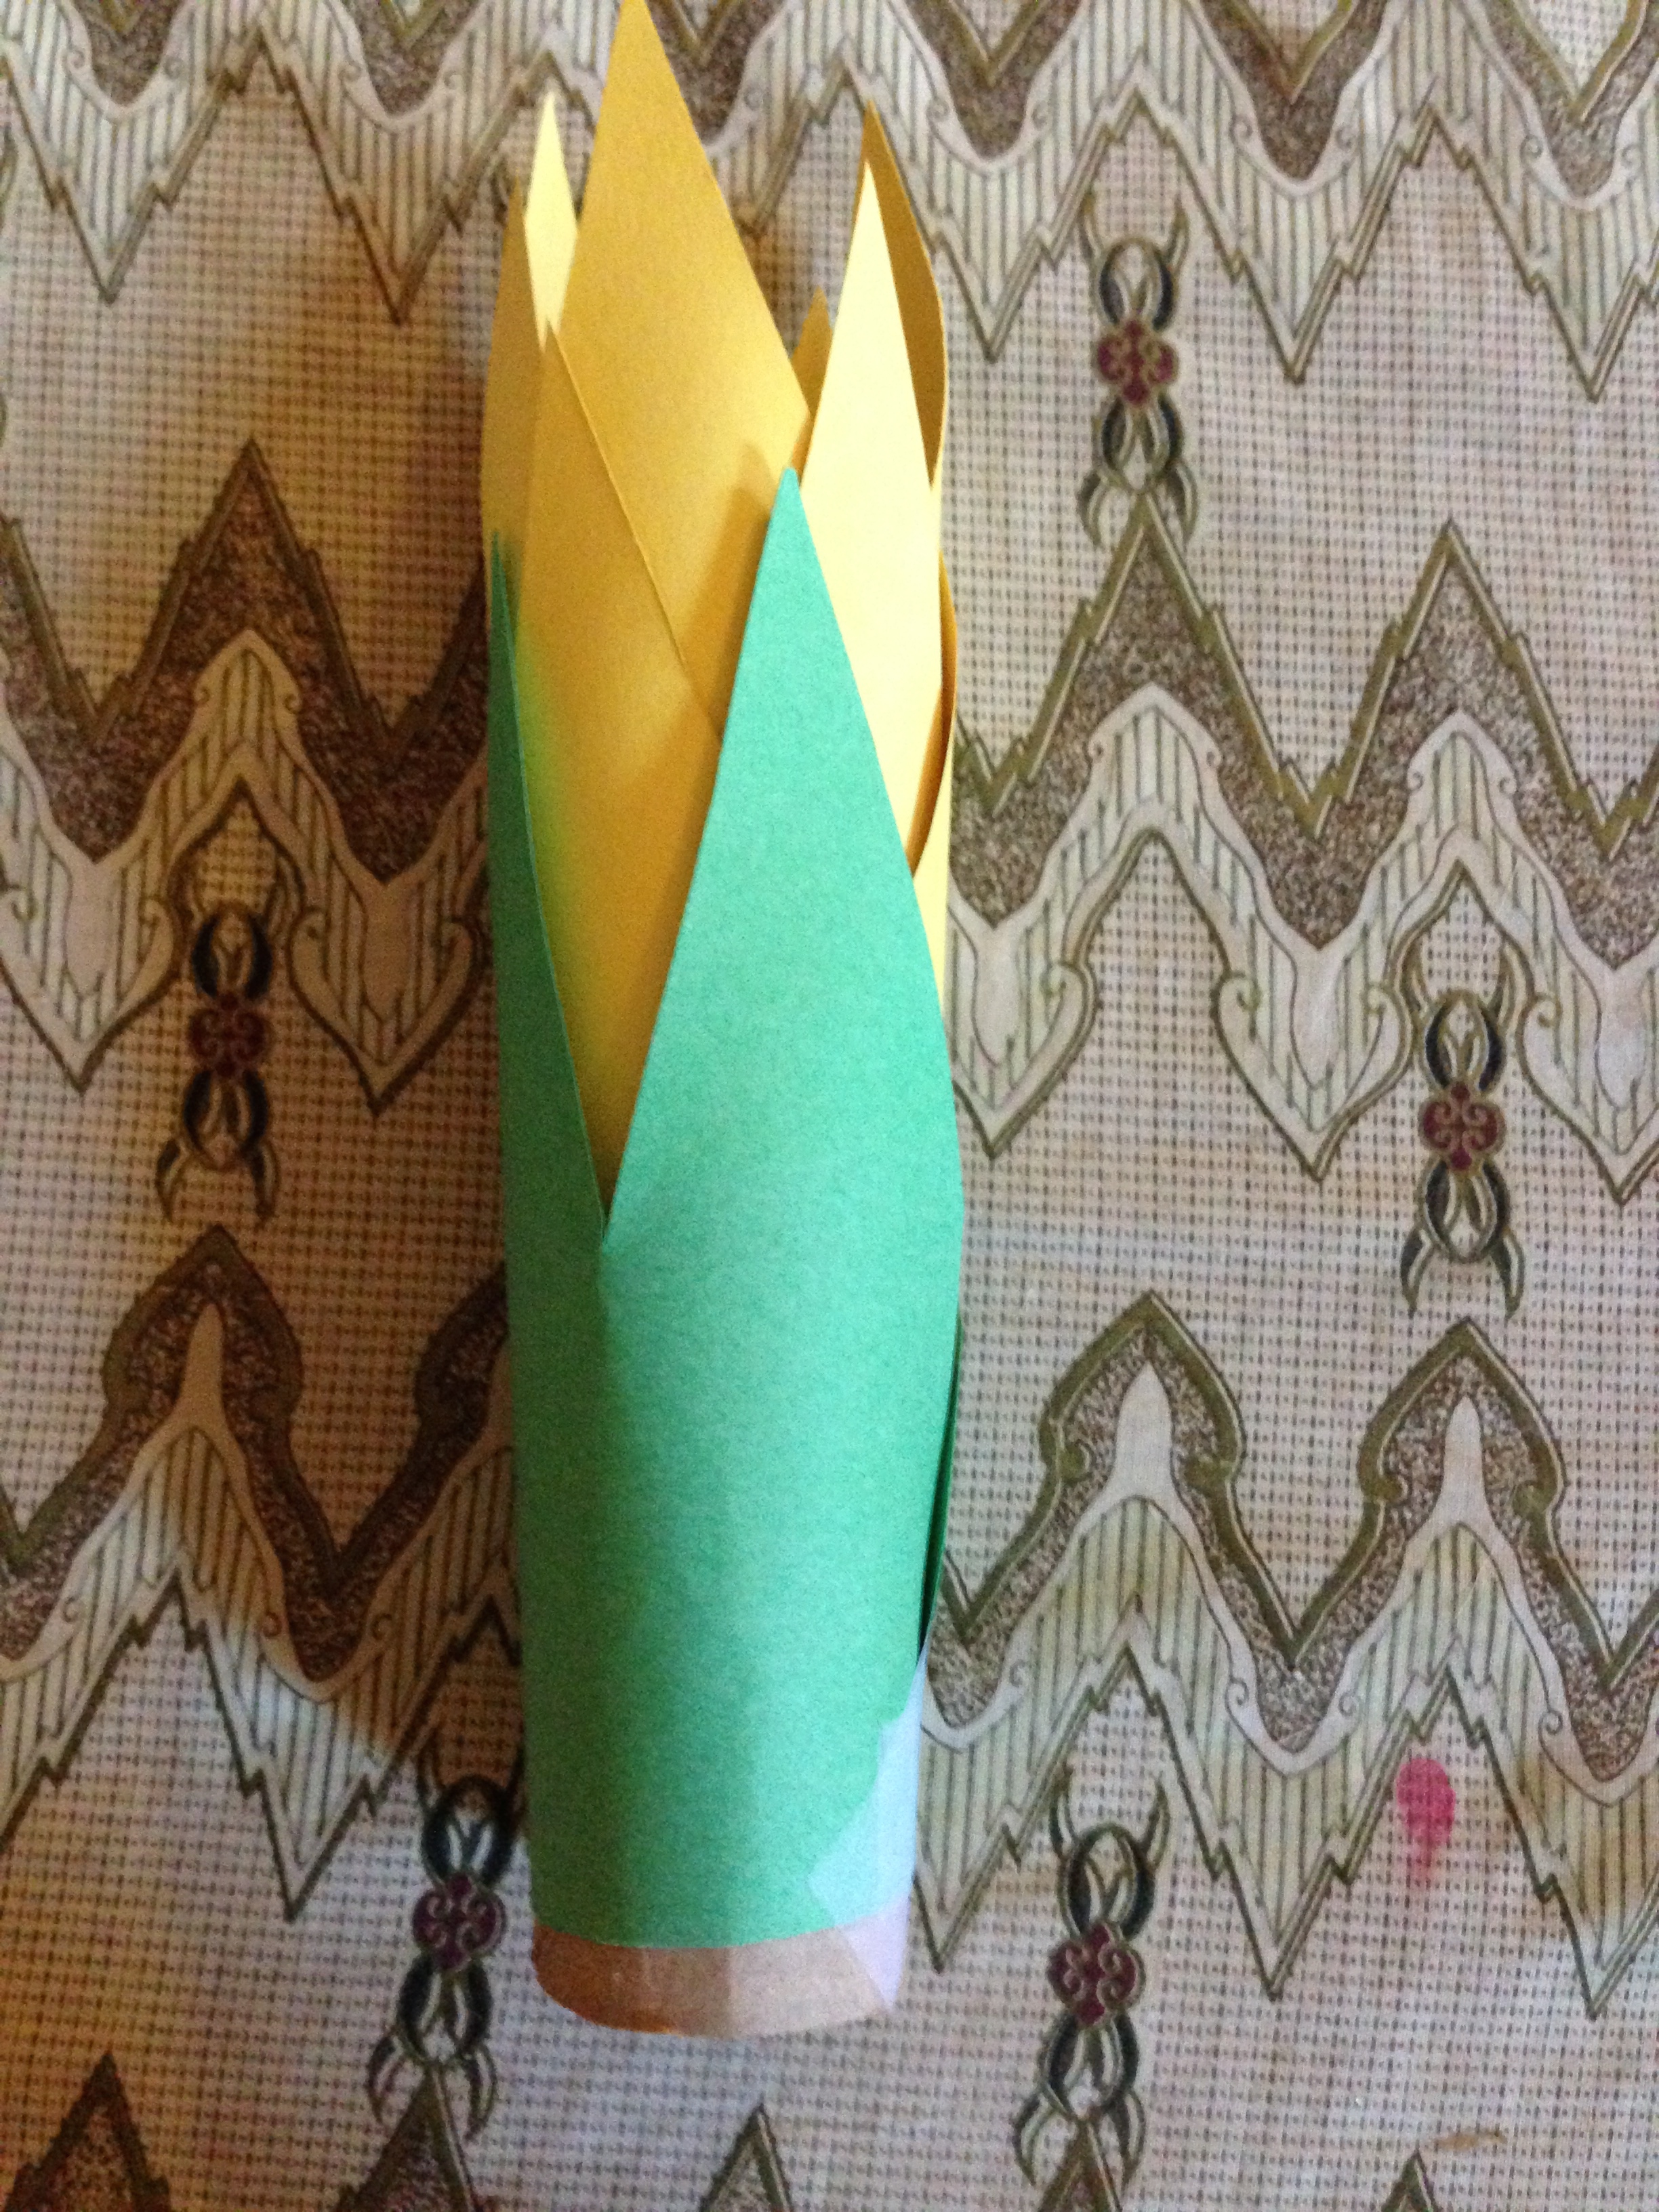
I can’t wait to see my room with all these blues, greens and yellows.  Half of my seat covers will be this fabric and the other half a striped fabric with the same colors.  If you decide to try this out yourself, or if you have tips that would have made this whole process easier leave a comment.  Thanks for reading my first ever blog post!!!!